
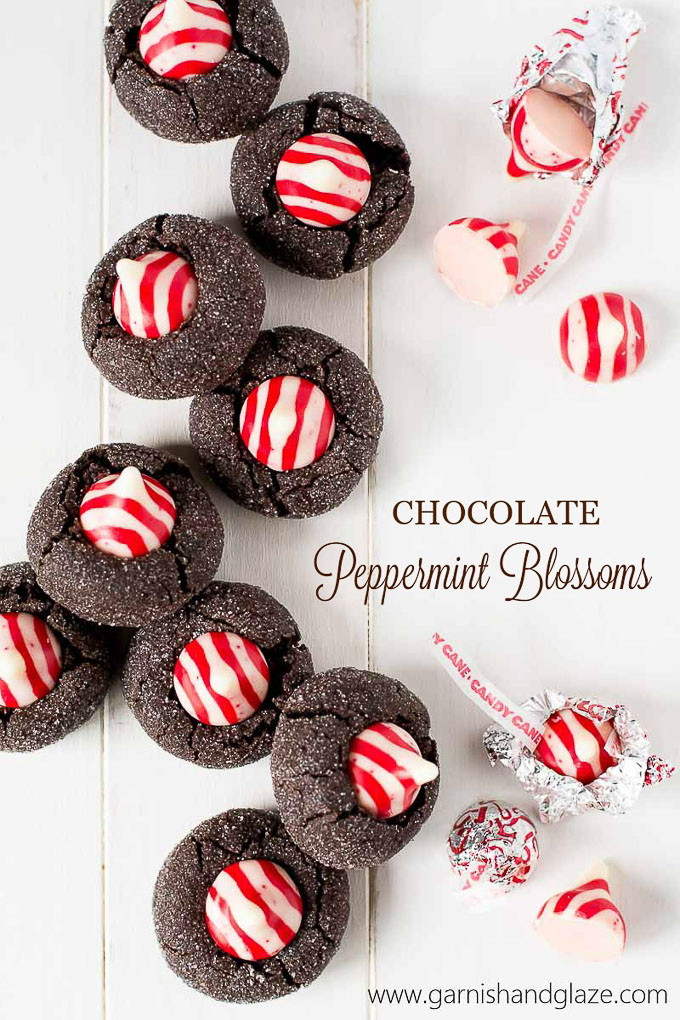
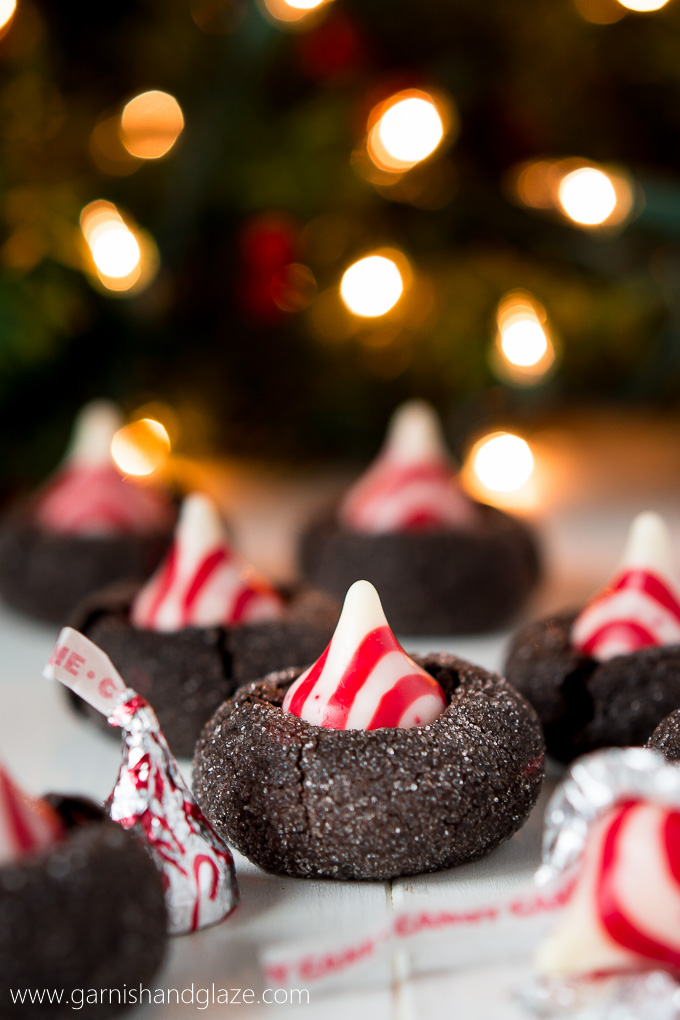
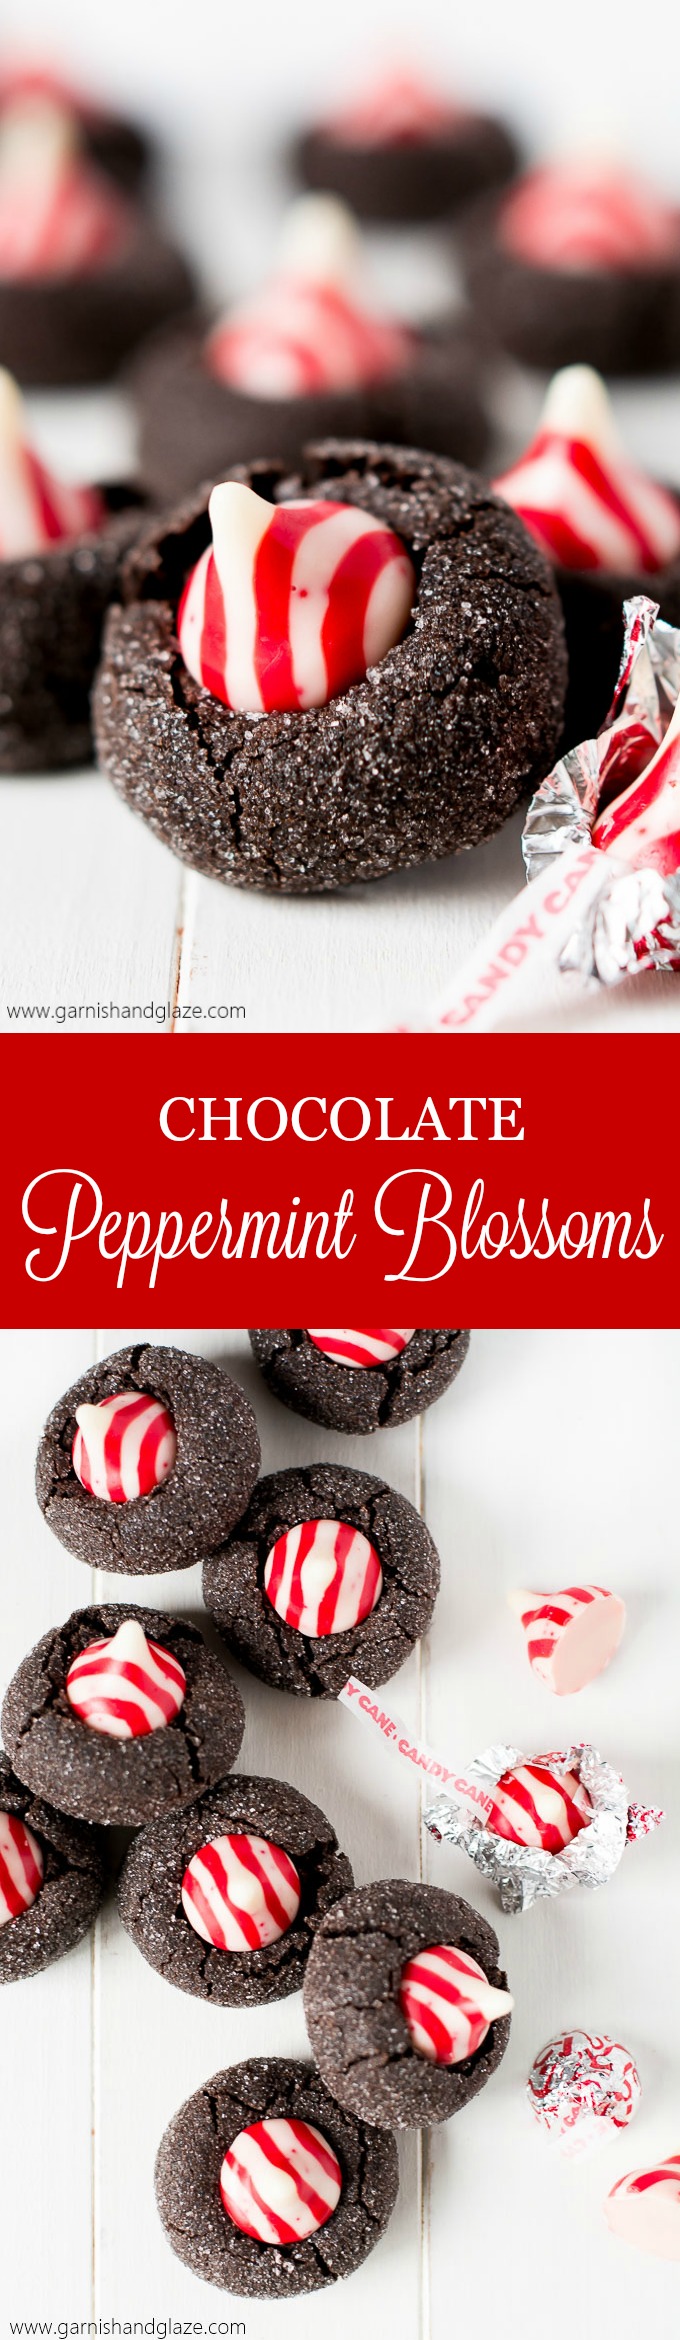
With a soft dark chocolate cookie base and peppermint kiss, these Chocolate Peppermint Blossoms will be the most beautiful cookie on your Christmas plate!
Chocolate Peppermint Blossoms
Pin it to your DESSERT recipe board to SAVE it!
Follow Garnish & Glaze on Pinterest for more great recipes!
This post may contain affiliate links. Please read my disclosure policy.
There are over a hundred reasons why I love Christmas time and one of them is how pretty all the decorations and food are. I love the green Christmas trees, garland, and holly; gold stars; white and colorful lights; red and white candy canes, and these Chocolate Peppermint Blossoms. 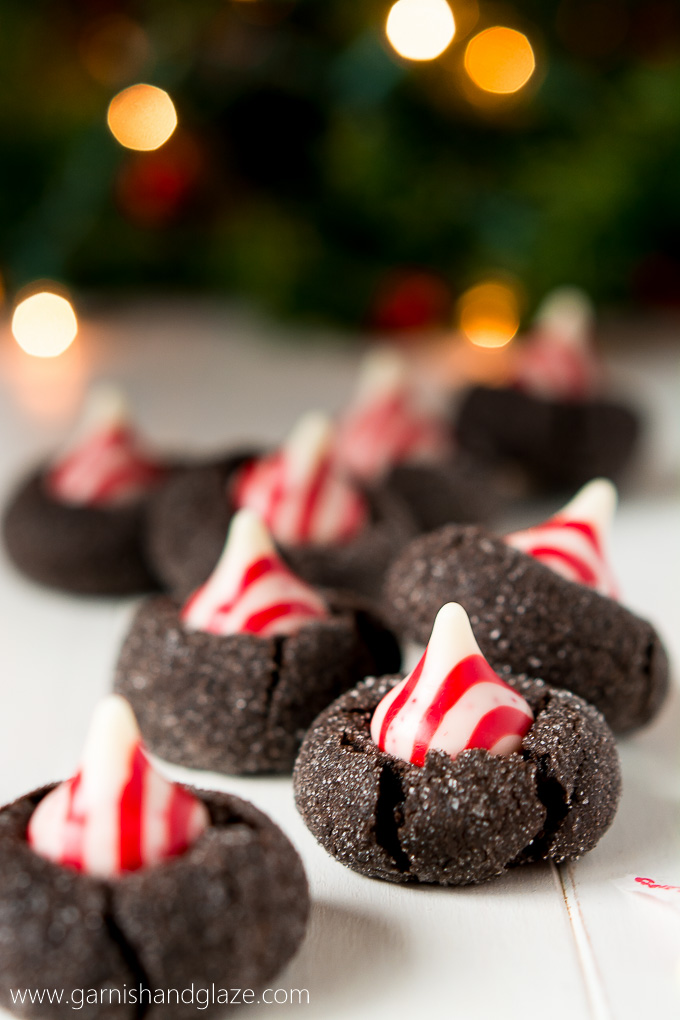
How beautiful are these babies?! The cookie portion is amazing all on its own! It’s a dark chocolate brownie cookie rolled in sugar and baked just until done creating a soft fudgy delicious cookie.

These Candy Cane Kisses seem to have a lower melting point than chocolate kisses. I found out with the first batch I cooked.
Like Peanut Butter Blossoms Cookies, I pushed the kiss into the cookie right when they came out of the oven. Annnd after 5 minutes they had completely lost their shape and were just a puddle. They still definitely tasted great but I missed that cute little pointy kiss.
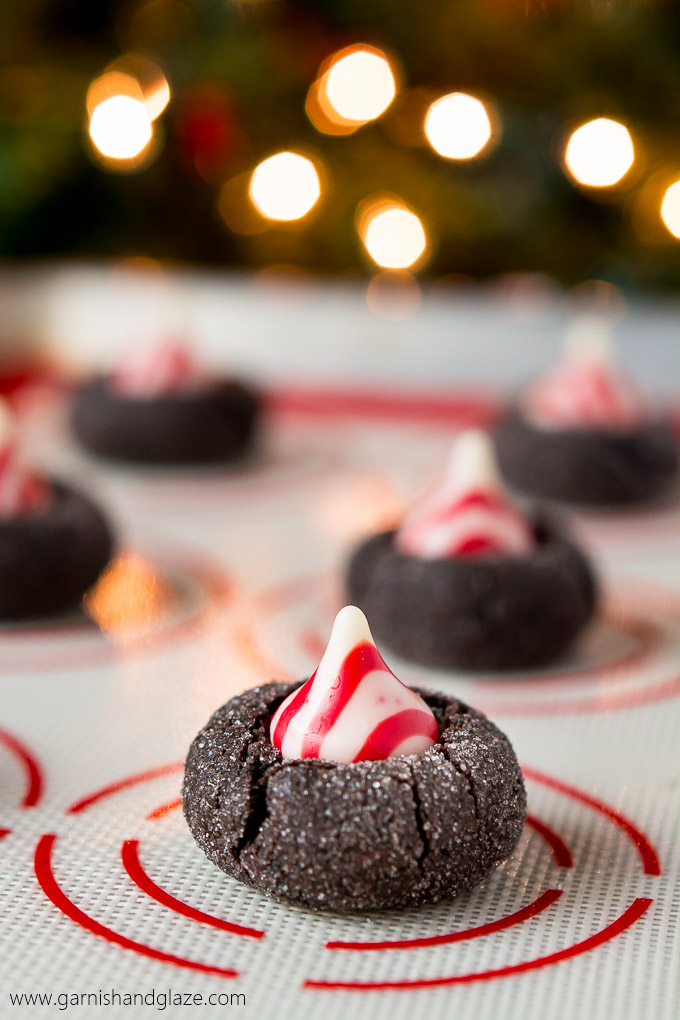
So I did some testing and found that the optimal time to insert the kiss is 6 minutes after coming out of the oven. The cookie is still pliable enough to push in the kiss but not too hot that it melts the kiss.
Voila! A beautiful festive Christmas cookie that will meet all your chocolate and peppermint expectations and look absolutely stunning on your Christmas cookie plate.
Before you run off and make these, don’t forget to enter the GIVEAWAY! I contribute a recipe each month to the blog Spend with Pennies and Holly has put together this awesome giveaway. Scroll down and enter for a chance to win one of TWO $100 Amazon Gift Cards! ***GIVEAWAY HAS ENDED***
Tools used to make these Chocolate Peppermint Blossoms:
Jelly Roll Pan Baking Sheet– I use these ALL. THE TIME. They are great for making cooking or baking rolls, chicken, pork chops, roasting vegetables… I have 4 which is especially nice for when making cookies or rolls.
Silpat Mats– These are great for cookies and candy making. They make the process so much easier and clean up so much faster.
Kitchen Aid Mixer– I LOVE this baby! I use it for cookies, cakes, cheesecakes, doughs… This will become your best baking buddy and will last a lifetime. Did I mention it comes in ever color of the rainbow, plus more!
Chocolate Peppermint Blossoms

Chocolate Peppermint Blossoms
Ingredients
- 1/2 cup butter*,, room temperature
- 1/2 cup granulated sugar
- 1/2 cup brown sugar, packed
- 1 egg
- 1 egg yolk
- 1 teaspoon vanilla
- 2 cups all-purpose flour**, (240 grams)
- 1/2 cup cocoa powder (I used Special Dark Cocoa)**
- 1 teaspoon baking powder
- 1/4 teaspoon salt
- 1-3 tablespoons milk
- 1/4 cup granulated sugar
- 34 Candy Cane Kisses, unwrapped
Instructions
- Preheat oven to 350 degrees F.
- In a mixing bowl, combine the flour (measure this & cocoa powder by spooning into measuring cup and leveling off), cocoa powder, baking powder, and salt. Set aside.
- Cream butter and both sugars together in the bowl of a stand mixer until fluffy. Mix in the egg, egg yolk, and vanilla until smooth. Add the dry ingredients a little at a time while mixing on slow until combined. Mix in the milk until smooth and dough comes together (I only use 1 tablespoon). (If you chose to use a total of 3/4 cup butter and your dough it difficult to roll, refrigerate for 1-2 hours.)
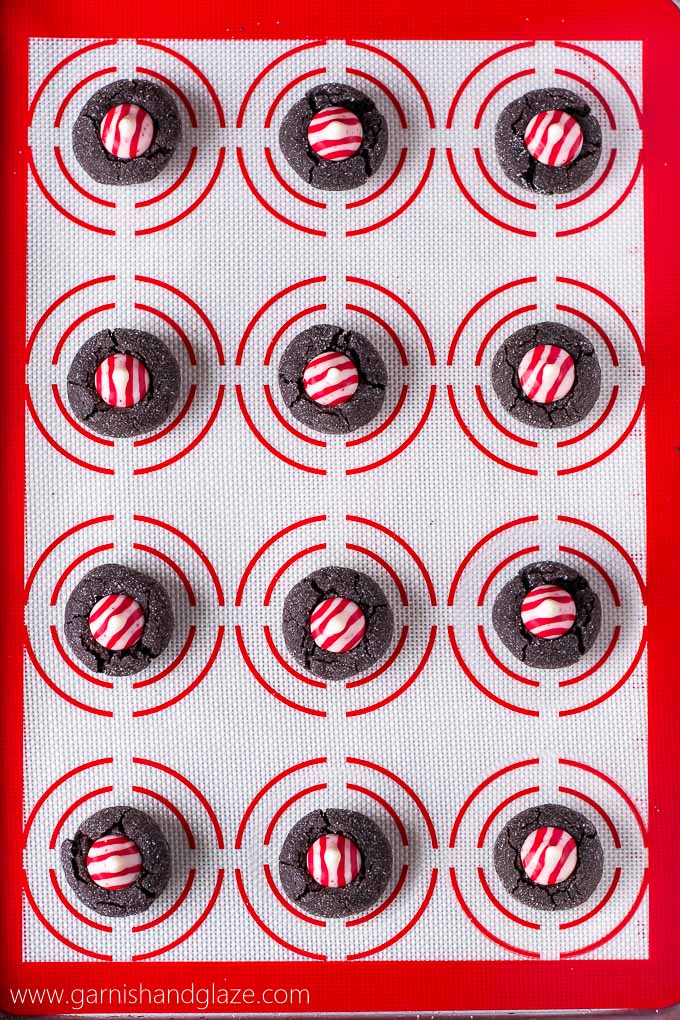
- Roll dough into 1 inch balls (about 1 tablespoon) and then roll in the 1/4 cup sugar. Place 2 inches apart on a baking sheet (preferably lined with a Silpat mat). Bake for 10 minutes.
- When done, immediately move cookies onto a cooling rack or plate. Let them cool for 6 minutes and then gently press the kisses into the top. (If you do it earlier or leave them on the hot pan the kiss will get too warm and lose its shape.)
Notes

I followed the recipe and these turned out great! Thank you for posting them. I was a little worried, since these had such mixed reviews, but no need. I did make sure to choose large eggs, perhaps that helped? Only needed 1 T. of milk. My family is devouring them as I write.
Turned out great! Four year olds helped roll the cookies in the sugar and now they are helping eat them! Thank you, we will make these every christmas 🙂
These are so pretty! While the dough was a bit dry and cracked apart when inserting the kisses, I discovered if I flattened the balls just a bit before baking and waiting only one minute to insert the kisses they worked fine! Maybe I will try adding more butter next time.
I am trying to do my cookie making this year spread out (over 3 weeks) so it is not so much at once. I am trying to see which ones i can make ahead of time and store. Could these be made and stored for about 3 weeks before eating? Would you suggest freezing?
I made these last night and they are getting high praise from the family! I ended up clearing space in the fridge and putting each batch in there to set the chocolate. I will definitely make these yummies again!
I’m so glad you all enjoyed them! Thanks for coming back and leaving a comment! 🙂
I added peppermint extract and froze them for about a week! Turned out great!
I made these true to the recipe, they were perfect! I feel like, perhaps people were forgetting the 1 egg PLUS “1 egg yolk” when I first read through the recipe I missed that. But I did catch it, and my cookies came out perfectly. Very good, my whole household approves.
My 11 yr old daughter made these for our cookie exchange party. They were delicious. Rich and fudgy but not overly sweet. The peppermint kiss made them look great and it complimented the chocolate nicely. She followed the recipe to the letter, especially about fluffing and spooning the flour and waiting 6 min to insert the peppermint kiss once they were out of the oven. These cookies came out perfect!
Thank you so much for leaving a review Annette! I’m so happy it turned out for you guys. Tell your 11 year old good job! Have a Merry Christmas!!!
This is the second time I’be used this recipe, and the cookies turned out perfectly both times. I paid particular attention to your recipe notes, and actually added 1/4 C Crisco along with the stick of butter called for. The batter was a little loose so I chilled it a bit, which enabled me to roll it into balls more easily. I followed the directions to allow the cookies to cool for 6 minutes before pressing the Hershey’s kisses on top, and my cookies are picture perfect! Thank you for a holiday favorite of our family ~ they’re delicious!
These taste awesome, but we had to put the peppermint in upside down. I don’t know if my house is too cool, but they hardened fast, so they broke apart when pressing the mints in. Cookies are not at all dry though. Very yummy all in all.
I just made these, they are quite delicious. Mine were a little crumbly, but I think it was my bad hershey kiss application. I was wondering if adding both eggs instead of one egg and a yolk might help. I also might try this with other flavors of kisses. I really like the brownie cookie. Thank you!
My sister and I made these for the 1st time Sunday and they were amazing.
I wanted to make more for some more today for some company coming over tomorrow and could not figure out why the batter was so soft. Then I noticed the recipe was updated 12/17 to add another 1/4 cup of butter. The dough was too soft to work with. So disappointing. I tried to add a little more flour and cocoa but they just weren’t the same.
I will stick with 1/2 cup of butter in the future.
Oh no! I’m sorry Melanie! Thank you so much for letting me know your experience. I have been recipe testing with these the last few days because while the original recipe turns out great for me, I was getting complaints the dough was too dry and not coming together. (Maybe more people who have failures come back to comment than people how have success, so I thought I should make revisions.)
With the addition of 1/4 cup butter I was able to create a softer dough that I was still able to roll. It did spread slightly so it’s not as puffy of a blossom. How much milk did you add, if any? Both with the original and this last time? Refrigerating the dough always helps to stiffen it up to work with but if the original recipe worked for you, go with it.
Ah! It’s so hard to make a recipe work for everyone when it comes to baking because I think more often than not, people are over measuring their flour. If everyone would just weigh everything there wouldn’t be so much discrepancy. Thank you so much for letting me know the original recipe worked for you. I’ve changed it back but wrote in adding 1/4 cup as the exception (assuming there are more like you who had success with the first recipe).
I was so excited to make these cookies…and after reading everyone’s comments I decided to be proactive…I added an extra TBS of milk…and of course I measured the flour exactly and leveled it off…much to my dismay the dough was still kind of dry but I proceeded anyway. I rolled the cookie dough into balls and then coated with granulated sugar…and once on the cookie sheet I even flattened them a little with a glass…my oven temperature is perfect and I timed everything exactly…the baking and the placing of the peppermint kisses…and the cookies still crumbled…what a disappointment… : (
I was looking for an attractive, yummy treat for a cookie exchange and am so glad I tried this recipe! Because of previous comments, I was generous with the wet ingredients and modest with the dry ones. I added 1/4 cup of butter, a bit of extra milk and ended up not using about 1/4 cup of the flour/cocoa mixture because the batter was getting difficult to mix. The cookies ended up coming out perfectly and the cook and rest times were completely on point! This was sort of a last minute venture and I was determined to not run to the store for anything so I ended up using regular Hershey’s kisses instead of the peppermint ones but then made a chocolate drizzle and smashed candy canes to sprinkle on top. Everyone loved them!
Just made these cookies and they are delicious, but I had to add 4 T. of milk to keep them from breaking apart. Also, I took a sugared flat bottom glass and slightly press them before baking. I only baked them for 9 minutes and put the kiss on in 5 minutes. Perfect!
The butter says 2 cups (1 stick) isn’t 1 stick 1/2 cup? Just making sure. I read comments that read it was too dry maybe butter factor is using 1 stick and not 2 cups. Ready to try this.
Regina, Is it appearing as 2 cups for you? To me it’s “1/2 cup” as it should be. I’m making them again tomorrow to try to see where things went wrong for some people. I thought maybe people were measuring their flour wrong but it could also be their cocoa powder. I’m wondering if maybe people are packing their cocoa powder instead of spooning it in the same as you measure flour.
I have a question can you make the dough and let it set in the fridge over night? Can’t wait to try these! Thank you!
I haven’t tried refrigerating it but I’m sure it will be just fine.
Hello,
In the ingredients list it has brown sugar but I cannot find where or when you add it.
Thanks!
Katie
Sorry Katie! When I say “mix the butter and sugar together” I was referring to both sugars. Just fixed it to make it more clear.
I followed this recipe exactly as written, and, honestly, I was disappointed. The dough was very dry and finally I had to add more milk so I could shape them into balls. After baking, they were still balls, never having flattened – not a bit. After waiting the six minutes, the cookies fell apart when placing the kisses on top. The few that stayed together were dry. I tried this recipe as it did not use mint extract as some others did and my husband does not like a strong mint flavor. Unfortunately, I will be seeking a new recipe.
Connie, I’m sorry to hear these didn’t turn out for you. It sounds like you added too much flour. 1 cup of flour weighs 120 grams. The best way to get the accurate amount is to mix your flour around in the container/bag to loosen it and then spoon it into the measuring cup. The cookies should spread/flatten a little when cooked, though not as much as a typical cookie because they are meant to be thick so that there is enough cookie to press the kiss down into.
Just finished a batch ????????????Yum!
Happy to hear you like them Linda! Merry Christmas!
How do we keep the cookies from falling apart once we press the kisses into them?
Thx
If your cookies are falling apart you are adding too much flour (you should be spooning flour into the measuring cup) or cooking them too long.
Loved these so much!! Only thing I would edit would be to add a little bit more milk at the end. It really helped form the batter into perfect cookie dough!
Loved these so much!! Only thing I would edit would be to add a little bit more milk at the end. It really helped form the batter into perfect cookie dough!
Gosh these turned out fantastic! Good advise about the timing on the kiss. I rushed the first pan and quickly realized I should pat more attention to the comments you made. They still tasted great, but the next pan had the wow factor too!
Thanks Holly! Yeah, I learned that about the kisses too. But then we had an excuse to not give them away! 🙂
Made these with my girls today and they are so delicious, and so fun to make! I’ have a bunch of kisses left so I’ll definitely be making more!
Happy to hear! And perfect excuse to make more! 🙂
I made these this afternoon and found the dough to be very dry. Had to double the milk to get the dough to form balls. When I baked them they didn’t spread at all. I let them cool for the suggested amount of time and found that many of them broke apart when pressing the candies into them. They taste alright, but a drier texture then I would have expected from a cookie like this. Most likely wouldn’t make these again.
Kris, It sounds like you probably added too much flour. Flour should be scooped into the measuring cup and then leveled off with a knife. You could also try weighing the flour. 1 cup should weight 120 grams.
Can’t wait to make them! Can they be frozen?
I haven’t tried to freeze them but I’m sure they’d be fine. Better fresh, of course!
Just made these! They are yummy, now I need to hide them from my husband and girls, so they’re not gone by morning! 🙂
Haha! I’m so glad you guys are enjoying them, Dawn!
Instructions say to roll ball in chocolate. I assume you meant to roll ball in 1/4 C. granulated sugar?
Patty, yes! Ah! I just fixed it so it says to roll the dough in the 1/4 cup sugar. Sorry about that!
Thank you! That’s what I thought, just wanted to make sure!
In your recipe it says roll in chocolate. Do you mean roll on suger?
Dana, I’m so sorry about the typo! I fixed it. You roll it in the 1/4 cup granulated sugar.
I will being making these soon
Yay! You’ll love them!
Must try these this holiday season
You definitely must! Enjoy! 🙂
The directions say to roll the balls in chocolate but the ingredient list does not include chocolate for rolling. Are you rolling them in extra cocoa powder or chopped chocolate?
I’m so sorry Debby! I don’t know who I miss wrote that. Just fixed it. You roll it in the 1/4 cup sugar.