
Yesterday was my 3 month anniversary of Garnish & Glaze! Weird how time seems like it goes by fast and slow at the same time. This blog has been such a fun hobby and I have learned TONS!
Some of you out there have requested that I share some tips and how I started my blog so this post is for you…and anyone else who wants to start a blog or is just curious about how the whole blogging thing works. I am by no means an expert (I have so much more to learn!) and I am still working toward where I want my blog to be, but this is what I’ve got for ya so far. (I’m working on a few more posts for aspiring bloggers on topics such as photography, social media, monetizing…stay tuned!)
1. Pick a domain name . (If you already have a domain name, skip to Step 2) BRAINSTORM! Choosing a name was probably the hardest part for me but I finally settled on garnishandglaze.com. When you narrow your ideas down, head over to BLUEHOST to make sure your domain name is available (below is what you will see). Just enter your desired name, hit NEXT, and it will tell you if that name is available for you to use. You do have the option to choose something other than “.com” so if you really want a name that is already taken you could go with “.net” but since most people assume websites are “.com” I would just choose your next runner up. 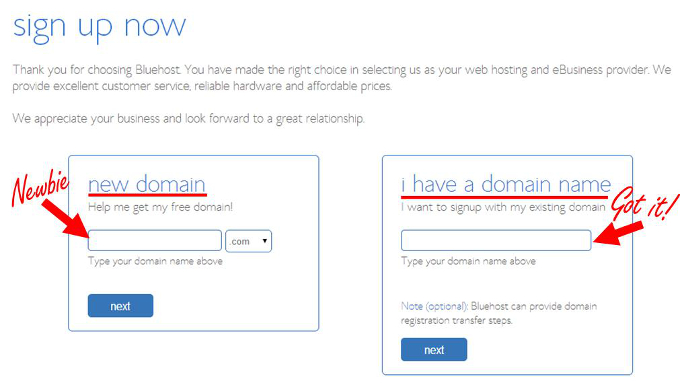
2. Sign up for self-hosting through Bluehost.com. (As shown above, for a new domain fill in the box on the left but if you already have a domain name fill in the box on the right.) Hosting your domain name is like renting a piece of the internet for your site. Bluehost has prices for as low as $3.95/month (that is a GREAT DEAL! I paid $4.95/month and the normal price is $6.95) and you get your domain name free! If you don’t want to pay for hosting you can use a blogspot or wordpress.com to host your site but then you’ll have “.blogspot.com” or “.wordpress.com” behind your domain name and you won’t have complete control of your site to make custom changes. You can switch over from blogger or wordpress to self-hosting later, but I recommend paying the $3.95/month and avoid the pain of switching. Plus, it’s just more professional to have a domain name free of those tag-alongs (Oooo Girl Scout Tagalong cookies!). Below is the package & options I signed up for (I might go back and set up Site Backup Pro just to be safe).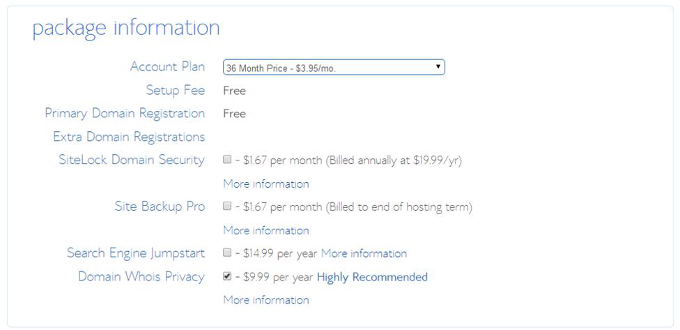 3. Install blogging software: WordPress.org. I use WordPress.org which is probably the most popular blogging software, not to mention it is so simple to use and is a cinche to install (and it’s free!). To do so, just log in to your Bluehost account and on the home page you will see this:
 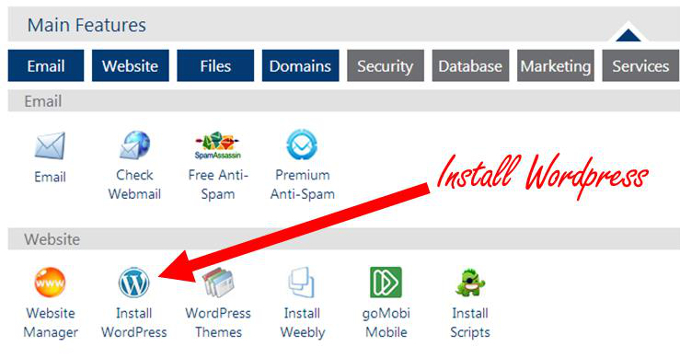 Follow through with the simple prompts and once the install is completed, write down your username and password so you can then sign in to your Login URL (yoururlname.com/admin) as shown below.
 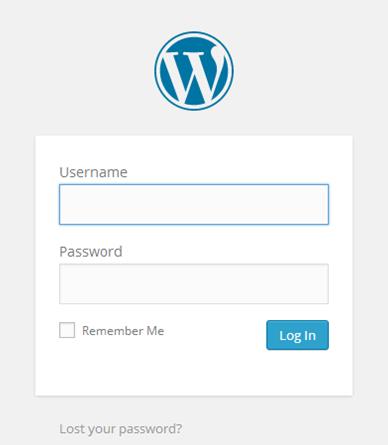 4. Dress up your site. Choose a Theme– Now that you own your own site, you need to set up how it will look. There are free themes through WordPress (I first used Expound) but unfortunately, many of these free themes are not compatible for all viewing devices. This means that when people go to your site using a tablet or mobile device your website won’t look the same as it did on the computer (only 45% of my site views are on a desktop). What I did (and recommend) is to head over to Studio Press and select a premium theme (you can change your theme any time and as many times as you want so you may want to try a few free ones to see what features you want in a theme before purchasing a premium one).
  I ended up getting the Foodie Theme + Genesis Framework and I have absolutely loved it! But go to Studio Press, browse the themes, look at their live demos (pay attention to color options because unless you are really good at code, or want to pay someone, you are often limited to changing the color of things on your site), make your purchase, and install your theme (directions are given after you purchase it and the developer of the theme often has tutorials of how to do so on their site… don’t be scared). Install Plugins– Plugins are pre-written code that add functionality to your site. Want a particular function on your site? Just search “wordpress (insert desired function here)” in Google and you’ll most likely find a plugin for it and the best part is most of them are free! 🙂 Below are some of the plugins I use:
- Askimet– This filters out comment spam. You will not believe how much there is! (I actually haven’t set this up yet but will very soon because I get at least 200 spam comments a day! Sheesh!)
- All in one Favicon– This allows you to make your own favicon.
- Contact Form– This is on my contact page and allows people to easily contact me.
- Easy Recipe Plus– This is the only plugin I pay for. It creates a beautiful format for your recipes that can even be customized. There is a free version (Easy Recipe) which I used to have but I wanted to have the ability to add links in my recipes and connect to Ziplist (which I still need to do). Definitely a MUST (at least the free one) for food bloggers.
- jQuery Pin It Button For Images– You want this if you have any pictures on your site. If you haven’t noticed, Pinterest is very popular and actually brings in the most traffic to websites (at least food bloggers). This allows your readers to hover over pictures on your blog and easily pin it to a board. Unfortunately, the hover ability isn’t possible on tablets and phones so I also recommend also getting the Pinterest “Pin it” Button Lite which will put a “Pin it” button at the top and bottom of a post so that readers can click and pin it while using a tablet or phone.
- Limit Login Attempts– This is just a good safety precaution so that no one hacks into your website.
You are now all set to start blogging! Yay!!! More blogging tips coming soon! (photography, stats, monetizing, social media…) 🙂 Please feel free to ask me questions or share with me what you have learned (I’m still a newbie too!).

Yay! I love this post! I must say, that I use blogger, and have my own domain name, and don’t have to pay a hosting fee to not have the .blogpost.com but all that stuff is so confusing to me that I don’t really know how I got around that haha. But I do wish that I had done wordpress when I started. There is a lot more functionality and customization that you have with wordpress that you don’t with blogger. I’m probably going to switch over eventually, but the process seems so daunting haha!
Thanks Paige! Yeah, that’s true that you can get your own domain name through any of the free hosting sites(blogger, wordpress.com, weebly…). The benefit of paying for hosting is the immense freedom and complete control to customize your site. You also have immediate tech support, your site is backed up, and you get an email set up with your domain name: melanie(at)garnishandglaze(dot)com instead of melanie(at)gmail.com. But it actually shouldn’t be too bad to switch from blogger to wordpress because wordpress already has a function to import all your blog files from blogger and a few other platforms. Also, Bluehost (and other hosting companies) has great tech support that would be happy to help with the process. 🙂