
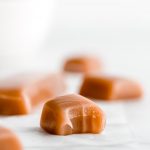
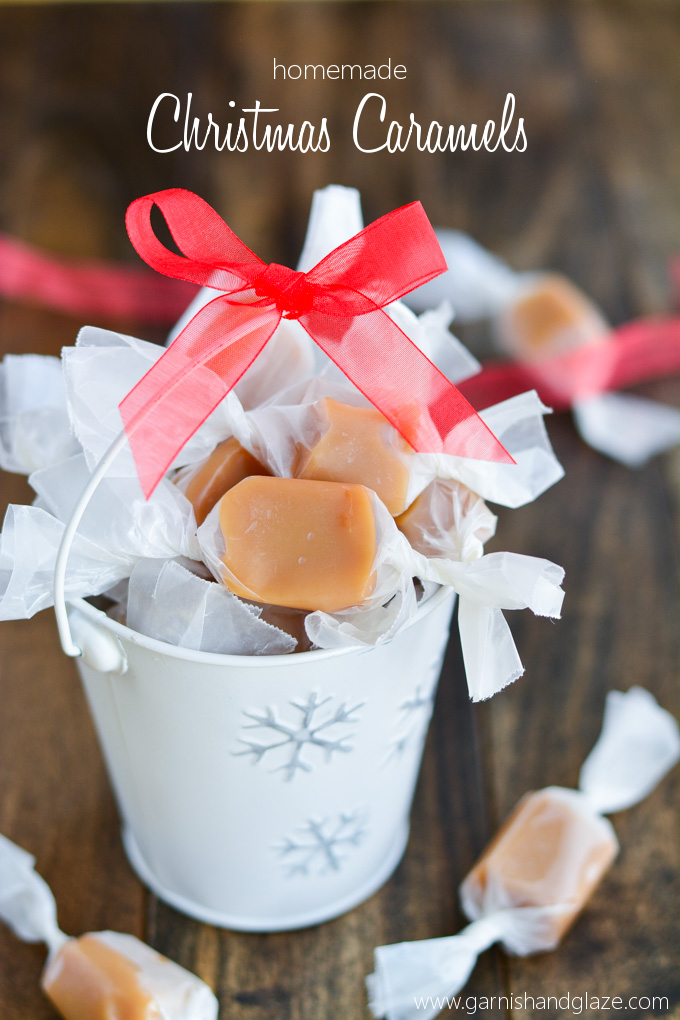
Soft, creamy, melt-in-your-mouth Homemade Caramels are the perfect holiday gift! Package them up and enjoy this heavenly candy all season long.

For as long as I can remember it has been a tradition to make Homemade Caramels and give them away as gifts to others during the holiday season. And when I say “caramels” I am talking multiple batches. We gave them to our family friends, teachers, friends at school, mailman, hair dresser… basically any person we came in contact with during the month of December.
We’ve started using the caramel in other treats we share too, like See’s Polar Bear Paws, Salted Chocolate Covered Caramels, and Homemade Caramel Apples.
Homemade Caramels

My mom would make the caramel (often two batches at one time… she’s got skill!) with the assistance of a child when she noticed we were bored and our hands could go to good use stirring. No one minded standing over the that yummy caramel and smelling the buttery sweetness though. Now when I smell caramel I instantly think “Christmas!”
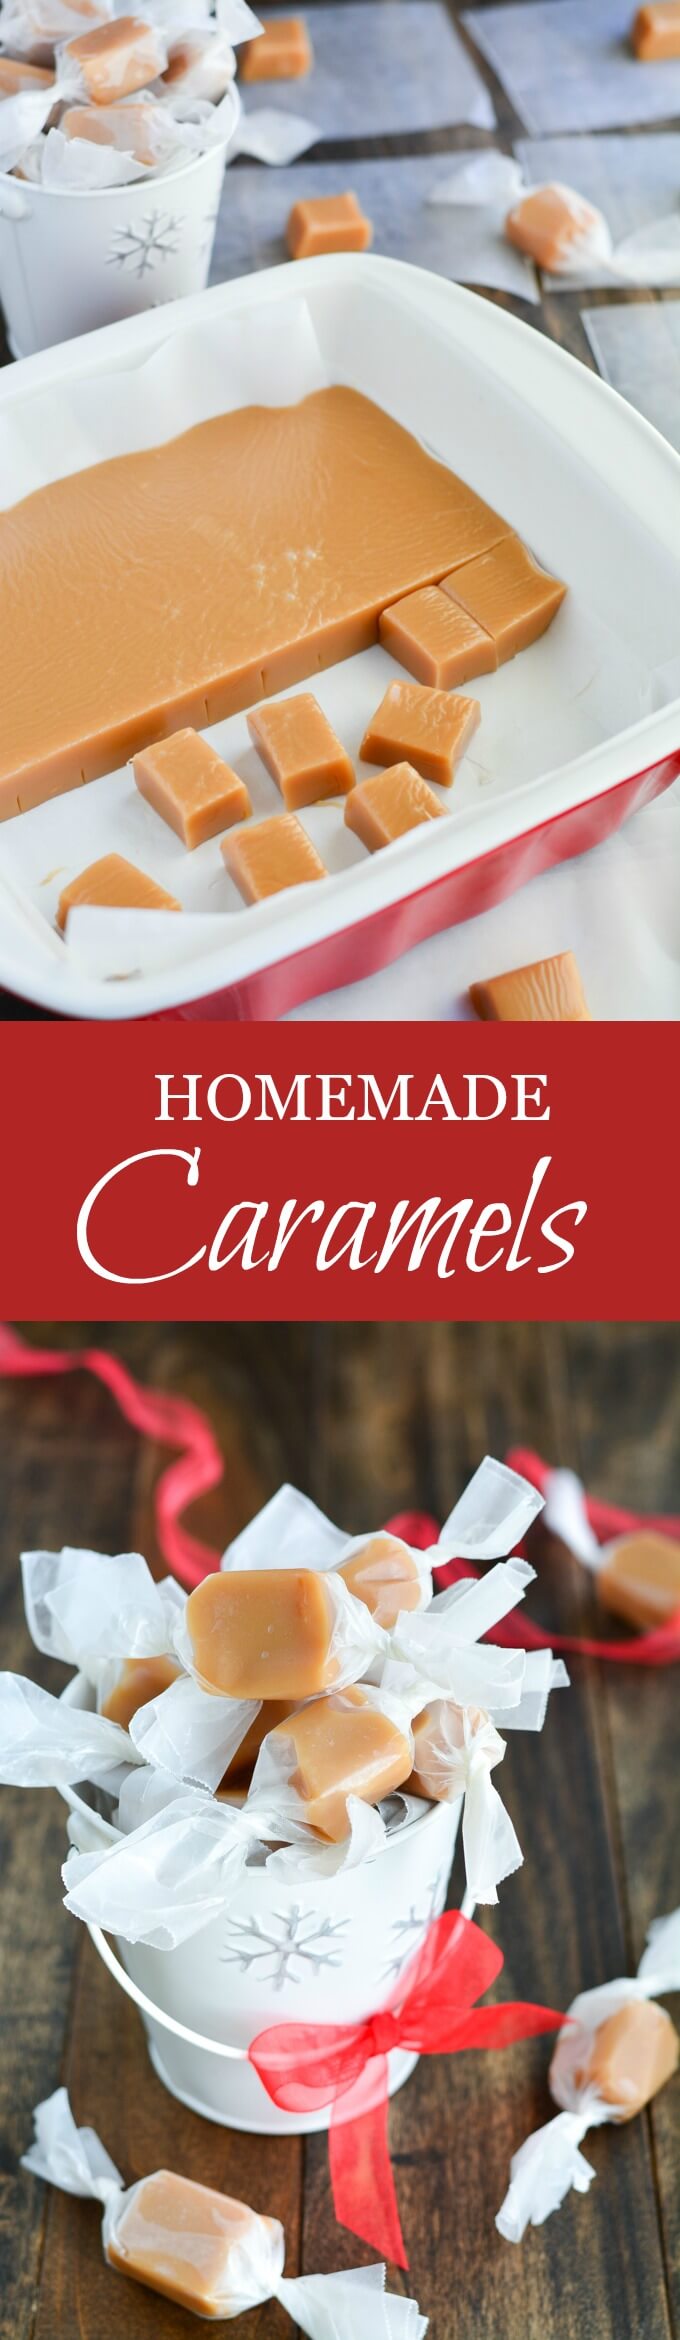
Later at night or the next day after the caramel cooled completely we would all gather at the table as a family and my mom would lay out pieces of perfectly ripped and cut wax paper (and ripping wax paper perfectly every time is really hard to do). She would then proceed to cut out the caramels out of the pan and place them on the wax paper. My brother and I turned it into a competition to see who could wrap the most caramels the fastest.

Each wrapped caramel was then tossed into the gigantic yellow bowl that said “blockbuster” (are any of those still in business?). It was fun…until our wrists started to hurt– child labor! But really, I loved it and plan to enlist my kids once they don’t try to eat them all.
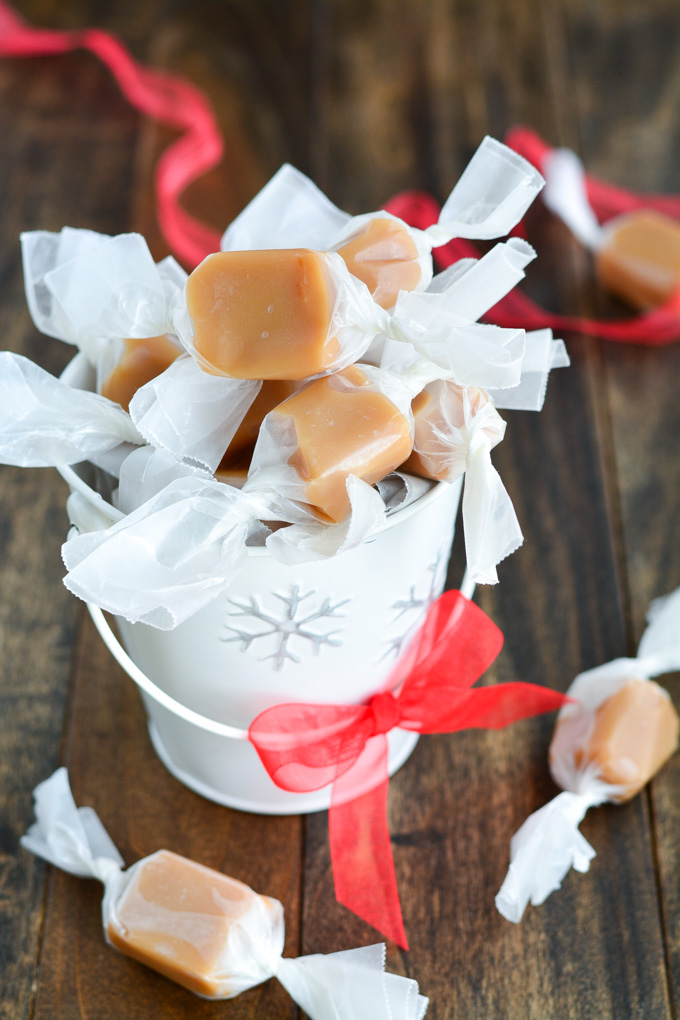
Once all the caramels were wrapped we then got out the cute holiday cellophane bags and filled them. Families got 20 caramels, really big families got 30, and individuals got 8 (with some exceptions… the more praise/obsession gets you more the next year). Some of my friends were lucky enough to get a family bag AND an individual bag.
Christmas wouldn’t be Christmas with out these yummy caramels. I hope you enjoy them as much as we do and make them part of your holiday tradition!

Ingredients needed for Homemade Caramels:
GRANULATED SUGAR– As the sugar cooks it goes through the Maillard reaction that results in a sweet nutty flavor and brown color.
SALTED BUTTER– The salt perfectly balances the sweetness and the butter gives it an amazing smooth creamy texture and richness as butter always does.
HEAVY WHIPPING CREAM– Makes the caramels smooth and creamy. For optimal results do NOT substitute with lower fat cream or milk.
DARK CORN SYRUP– Corn syrup is necessary to create smooth creamy caramel. I use dark corn syrup for both color and an added depth of flavor.
Vanilla– Adds that delicious flavor we know and love.

How to Make Homemade Caramel:
- Line a 11×7 or 9×9 inch pan with parchment paper. (Makes removing caramels so easy!) Alternatively, you can grease the pan (use a glass dish so you don’t scratch up your nice pans) with softened butter.
- Stir together the sugar, 1 cup whipping cream, corn syrup, and butter in the 4 quart sauce pan. (Place remaining cream in a liquid measuring cup and the vanilla close at hand.) Bring to a boil over medium heat.
- Once it comes to a boil, heat the remaining cup of cream in the microwave for 45-60 seconds until hot. Gradually add the cream in a slow stream to the pot while stirring. You need to add it slow enough that the caramel never stops boiling (if it stops your caramel will become sugary/crystallized).
- Stir frequently as the mixture begins to thicken and then stir constantly as it starts to darken. (I like to use a heat resistant rubber scraper)
- Cook until it reaches 240-242 degrees F. (I like mine at about 242 F.)
- Remove pan from heat and stir in the vanilla. Pour into the prepared dish. Let cool completely.
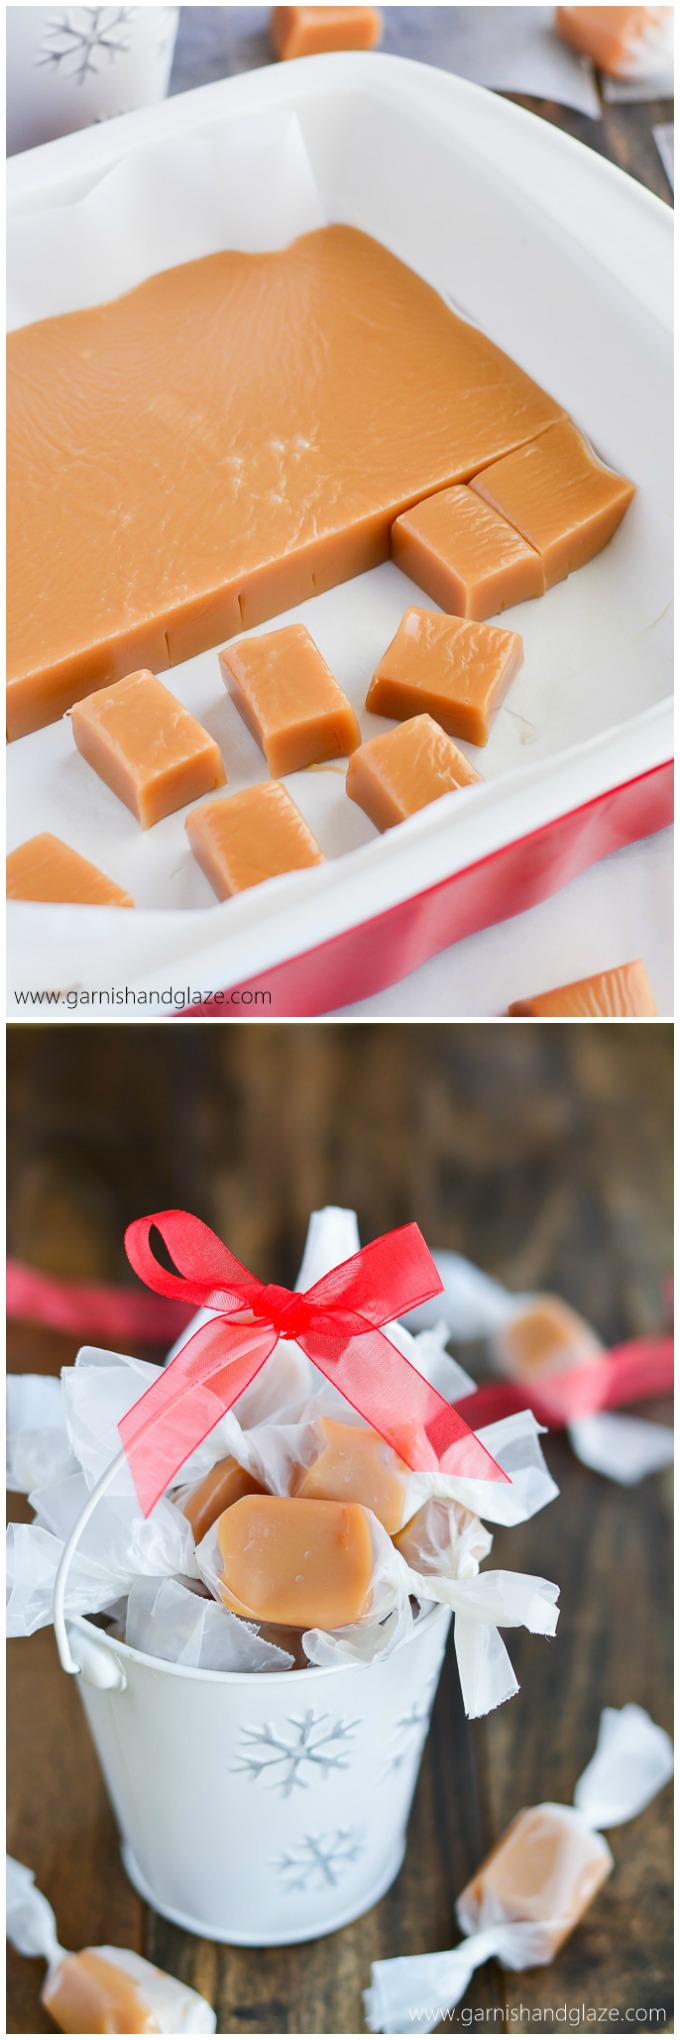
- Grab the edges of parchment paper and lift out the caramel. Use a sharp knife and cut caramel into bite size squares.
- Wrap up the caramels in cellophane or wax paper. (Caramels last up to 2 weeks but are best if eaten within one week.)

HOW LONG TO COOK CARAMEL?
You want your caramel to be soft but firm enough to hold it’s shape so you can coat it in chocolate. In the candy making world, this is referred to as the soft-ball stage. and ranged from 135 °F to 145 °F.
Altitude alters boiling temperature so you’ll need to make the following adjustments if you’re over 1,000 ft:
For every 1,000 ft above sea level, reduce cooking temperature by 2 degrees.
Sea level: 240-242 °F
2,000 ft: 236-238 °F
4,000 ft: 232-234 °F
6,000 ft: 228-230 °F
While a candy thermometer is the easiest way to make candy, you can use the cold water test if you don’t have one.
- Spoon some of the cooking caramel into a small dish of cold water. Let it sit for about 10 seconds and then use your fingers to push it together into a ball. How it feels in the water is very close to the firmness of the caramels when they’re cooled. The caramel should easy form a ball in the water but when brought out it will start to flatten.

HOW TO PREVENT CRYSTALLIZATION?
- Don’t shock the mixture. Be sure to heat that second cup of cream before adding it to the pan. Drizzle it in slowly so that the caramel doesn’t stop boiling.
- Use Corn Syrup. It’s chemical structure discourages crystallization so you get a smooth silky texture. (Read more about candy making and crystallization here.)

LOOKING FOR MORE HOMEMADE CANDY? CHECK OUT THESE:
- 4-Ingredient Chocolate Truffles are so easy but such a yummy treat.
- I’m not a huge fan of Oreos, but mix them with some cream cheese for these Peppermint Chocolate Oreo Truffles and I’m in love!
- Easy Chocolate Fudge is the absolute best! No dry crumbly fudge here.
- White Chocolate Raspberry Truffles are so pretty and such a yummy flavor combo.
- I’m addicted to this Spiced Pecan Triple Chocolate Bark. It’s seriously so delicious and I love that it’s unique and different than the classics everyone else makes.
- Crockpot Candy is a cinch to make and tastes so yummy!
- Sticky Paws are a delicious treat that everyone loves.

TOOLS USED TO MAKE HOMEMADE CARAMELS:
9×9 ceramic or 11×7 pyrex pan– This pan to creates the perfect thickness of caramels. It’s also great for small casseroles and dips.
4 Quart Pot– This is the perfect size pan for cooking caramels. Any smaller and it will over flow. I use this all the time for making sauces, rice, pasta…
Cellophane Wrappers– My mom always used wax paper to wrap her caramels which works great and is inexpensive but if you want your caramels to look a little Xtra, these precut wrappers are perfect!

Homemade Caramels
Video
Ingredients
- 2 cups granulated sugar
- 2 cups heavy whipping cream, (divided)
- 3/4 cup dark corn syrup
- 3/4 cup butter, cut into chunks (I use salted butter)
- 1 teaspoon vanilla extract
Instructions
- Prepare a 9x9 inch or 11x7 inch baking pan and line with parchment paper or grease with butter on bottom and sides.
- Place sugar, corn syrup, butter, and 1 cup cream in a 4 quart pot and bring to a boil over medium heat, stirring constantly with a wooden spoon or heat resistant spatula.
- Once it reaches a boil, heat the remaining cup of cream in the microwave for 45-60 seconds. Gradually add the cream in a slow stream to the pot while constantly stirring. You need to add it slow enough that the caramel never stops boiling (if it stops your caramel will become sugary/crystallized).
- Stir frequently (and scrape the sides of the pan) as the mixture begins to thicken and then stir constantly as it starts to darken. Cook until it reaches 240-242 degrees F*. I usually just do the cold water test by spooning a little of the caramel into cold water, let it sit for a few seconds and then pull it out and if it can hold the shape of a ball then it's done. If not, keep cooking and repeat the test.
- Remove from heat and stir in the vanilla. Pour into prepared dish. Let the caramels cool completely before cutting.
- Hold two sides of the parchment paper and lift the caramel out of the pan. Using a sharp knive, cut caramels into squares.
- Wrap up the caramels using pre-cut cellophane wrappers or cut wax paper strips 5 inches long and then cut each strip into thirds to get pieces that are bout 4 inches wide.
Notes


Made these as Christmas gifts this year and they came out wonderfully! Super easy recipe. First time making candy. This one is a keeper! Thank you!
Can these caramels be coated with chocolate?
Yes! Let me cool all the way, cut them up, and dip.
I use your recipe to dip pretzels in. Once they’ve cooled I dip them in chocolate. People go crazy! Thank you for the recipe!!!
I might wondering, I’ve got some heavy cream in my fridge that is 3 days past the expirely date- do you think it’s safe to use for making caramel? Thanks!!
Sorry to just get back to you Bailey! I am going to have to try dipping pretzels in now. I love sweet and salty! And I would say yes to using the heavy cream, especially if you keep it in the back of your fridge where it is the coldest. I would just dip your finger in the carton and give it a try. It will probably taste just fine.
Not sure if I can find dark corn syrup where I am….any replacement ideas?
Thanks in advance!
I made these twice, neither time they turned out? First time making caramels, so I’m a newbie. Any suggestions as to what it could have been?
Hi Erin!
I’d love to help figure out what when wrong. Can you tell me how yours turned out? Were they too soft? Too Hard? Grainy? Let me know the results and I can help you find where things have gone awry.
I love this recipe! I’ve now made them twice. Hardest part is waiting for them to cool, to eat some. My first time, I covered them in chocolate to put on cookie and candy plates for Christmas gifts. They were a hit. So Valentine’s day is coming and I’m making them to put with heart cutout cookies and homemade sponge candy. I’m sure there will be a lot of my family & friends who will be very happy. Thanks so much for sharing this delicious recipe with everyone!
That is the hardest especially because they smell so incredibly good! I’m happy to hear you are enjoying them! Thanks for the review and sharing them! 🙂
Melanie, I was looking for this recipe on Google and found your website. Looks like your recipe what I am looking for. I will try to make caramel roses for decorating cupcakes. I bookmarked the page, so I can return if have questions about the recipe. Thank you!
Been making caramels for decades and your recipe is very close to our old family one. The Temperature is very important. Depending on what your plans are for the caramel, 242 degrees yields soft caramel (for melting and making soft items like chocolate covered).. 244 degrees is good for cutting and when you desire a firmer texture. 246 degrees is very firm and almost hard caramel so they can melt in your mouth.
Be sure to test your thermometer to check how far off it is. No two are the same and altitude gives you different readings.
Also you can cut into strips and layer them in a freezer container with wax paper between the layers. I use Tupperware freezer containers. I have 4 batches in freezer now and in the past have kept them in freezer for over 2 years if air tight. But check on them because sometimes they turn into sugar.
Just a few tips and ideas.
Thank you so much for your helpful tips Carl! I’ve never tried freezing them because they disappear so fast but I’ll have to try that.
Wow. Love the caramel and so easy to make, definitely i will make for my kids.
Thanks Sara! They’ll love it!
Hi, I wanted to make these at our annual bake night, but cooling overnight won’t do….have you ever let cool in the fridge to speed up the process? That way we can all leave the party with these tasty caramels.
Thanks!
Stacey, I haven’t tried that. You could make a batch ahead of time and then make a second batch with your friends but let them cut, wrap, and take home the ones you made before hand.
These caramels look SO good Melanie! Love them!
Thank you Alida!
Caramel’s are a tradition for our family as well.. Sometimes I sprinkle chopped pecans in the bottom of the pan before pouring the Caramel in. Yum! You can also buy caramel wrappers already pre-cut at http://www.caramelwrappers.com
Oh my goodness, I didn’t know you could buy pre-cut! I just always did what my mom did. ha! I’ll definitely buy those in the future. Pecans sound delicious it them!
A lady at my church always gave these out as a thank you gift for those who volunteered . I loved how soft & buttery these are!
I bet she sure got a lot of volunteers with these at the end. They’re seriously one of the best food gifts you can give. I’m glad you’ve been enjoying them! Their soft texture and butter taste is what makes them so good!
My husband and I received these from a friend as a gift. He ate them all. Today we made a batch for ourselves ( I’m sure we will share). Good couples project on New Year’s Day! Well done on the instructions, easy to follow. Thank you.
Merry, Sorry you didn’t get to any any from your friend. I completely understand your husband though. They are so good you lose all self-control! Such a fun thing to make together. I’m so glad you found the recipe easy to follow! Happy New Year!!!
So yummy! I’ve made two double batches of these in one week. I dipped half of them in bittersweet chocolate and sprinkled with smoked sea salt.
THANKS for the recipe, I’m sure this will be a holiday staple,
Oh my that sounds fantastic, Ann! I made some turtles with half of mine. I’ll have to try your salted chocolate version!
Hi Melanie!
I’ve never made candy like this before–I’m a cake, cookie, and macaron kind of girl–and I just cleaned up from making these since I want to include them in Christmas treat bags to some friends at my office this week. I’m wondering if you have an approximate amount of time it takes for the temperature of the caramel mixture to come up closer to 242°? I was standing at the stove for a good 15 minutes and I just couldn’t get it past 225°! I turned up the eye a little more and adjusted my pot closer to the middle of the flame and then it started darkening in like, 20 seconds or less and the temperature pushed to 235-240° rather quickly afterward. It was practically instantaneous. If I can make sure to maintain the medium heat next time, about how long would you say it takes for you, as an approximation? I like to have a reference point. 🙂
I did also very loosely cover my pan, only because I have a really fluffy cat in the house. She never gets on the counter but her fluff just floats in the air sometimes, so I cover everything as a precaution. ????
Jamye, I’ve never covered my caramel. I definitely would affect the cooking time as it traps the heat. It is hard to give an exact time since it’s hard to set each stove top to the exact same level and elevation makes a difference too. Once it starts to boil I feel like it takes around 15 minutes to reach the soft ball stage.
Haha! I should have been more specific on that–I covered my caramels *after* I put them in my 9×9 to cool! And 15 minutes is about the time it took for me, so I’m excited that I did it correctly! I cut and wrapped them up last night and split one with my husband as a fun little treat since he wasn’t feeling well. I just. can’t. BELIEVE how smooth they are! I can’t wait to give them out to my friends at work tomorrow. Thank you so much for sharing this! I’ll definitely be adding this recipe to my annual Christmas staples. 🙂
Oh! Okay. That makes sense. I’m glad you guys liked them. They are the best! And I’m so happy to hear you’ll be making them each year! 🙂
My carmels seem to stick to the parchment paper? Did I do something wrong? How long do you wait to cut them?
I wait until they are completely cooled. Usually overnight. Next time you can forget the parchment paper and just butter the dish really well. That’s how my mom always does it. Although I should mention, in both ways, the very center of the pan seems to stick a little, I think due to the hot caramel quickly melting the butter right where it’s poured in.
Mine turned out hard at first then got soft as they warmed in your mouth…. any ideas???
Did you use a thermometer or the cold water test? It sounds like you cooked them a tiny bit too long.
I made these this weekend and the flavor is amazing! My issue was that after a day or so they became really greasy/ oily. Any ideas on how I could prevent that next time?
The wrappers do get a little greasy after a couple days. Sorry, I don’t have any advice other than to just grease with butter.
What if you don’t have a thermometer for it? Can you still make them?
Yep! I explain how to do the cold water test in the directions. That’s how I always make it. 🙂
Can recipe be doubled?
Yes! Just make sure you use a large pot.
Hi i just tríes your recipe! Ir took a long time yo Darken, I did the test on the ice water, the consistency was right but the color was not dark enough, I think they will come very hard , do you know why?
Did you use dark corn syrup? Judge doneness based on temperature or the cold water test, not color. The time it takes to cook depends on your exact stove temperature and elevation so it can differ so don’t rely on time for doneness.
Thanks for your answe! I actually tried for times, with dark and light corn syrup, the last one almost worked, it had a good consistency on the test water, but after I let it cool it became rock hard, that’s my problem they always turn very very hard !
It sounds like you’re not doing the water test correctly then. Your water should be cold and after you spoon some of the caramel in it, let it sit for a few seconds so it has time to cool. Clump it with your hand and it should form a soft ball. This is what your caramel consistency will be like once it cools. I’m going to make a video of the caramels this weekend so hopefully I’ll have the video up at the end of next week and maybe that will help.
Perfect! Thank you very much! I’ll give it a try and I’ll wait for the video
This sounds so delicious, can the caramel be used for candy apples?
Yes! I have a post for caramel apples that uses this caramel.
Hi mel not sure if messaged worked but just wondering what I can use for a replacement for corn syrup and with whipping cream can I use just normal thicking cream thanks
I haven’t tested the caramels with anything but corn syrup so I’m not sure how they would turn out with something else. You use heavy whipping cream located by the regular milk in the store.
These look incredible! I’m home sick with my (also sick) 2-year-old and I’m wanting to make them now for something fun and yummy. I only have light (clear) corn syrup, can I use that instead? I read I can make dark corn syrup with brown sugar. But if light works I’d rather just do that. Thank you in advance! ❤️ Merry early Christmas!
Sammi, Yes. You can use the light. It isn’t as strong as the dark and the color of your caramels will be lighter. Enjoy!
Your website has so many ads it’s difficult to even enjoy your website. I would try to look at what your viewer is seeing! uggg
Sorry. 🙁 This is how I make $$ for my family. I’ll try to make it a little cleaner.
I love how interactive you are with your audience! I’m going to try this once I recover from this flu, and hopefully it’ll come out as nice as yours ☺
I’m sorry you have the flu. That is no fun. You definitely deserve some of these when you feel better. Enjoy and get better soon! 🙂
Hello, I am very excited to try these, do you know how long these candy stay good for if stored in a air tight container, thanks awesome recipe ????
About 2 weeks.
Can my granddaughter and I dip these babies in dark chocolate?
Definitely! So good! You can make homemade Turtles too!
Do you have a recipe for the turtles?
When you are cooking… roughly how long does it take minute wise before you try your first test of putting it in water to test firmness? I’ve never tried that before and don’t want to overdo it. Thanks ????
It’s different depending on your elevation (at a higher elevation things that longer to cook) and it depends on the temperature of your stove top (they can very, especially gas vs electric). I’m making a video of these hopefully in the next week or two so that should help. From once it starts boiling it’s about around 12 minutes that I check.
This might sound stupid (quite a newbie at baking still), but by whipping cream, do you mean like cool whip? Thank you!
Crystal, Sorry, I should make that more clear. It’s heavy whipping cream that is located by the milk. Not cool whip.
“Once it comes to a boil, heat the remaining cup of cream”
This is confusing. Do you mean, heat the cream while waiting for it to come to a boil? Or, let it boil for one to two minutes while the cream is heating in the microwave? Thanks.
Put the remaining cup of cream in the microwave to heat up after you see the contents in the pot starts to boil. You want the caramel to be boiling for a little bit before you add the heated cream, and when you do add the heated cream, you need to stream it in slowly as you stir. Does that help?
Even with the cream in them they are still ok without being refrigerated? Do they last longer than the one week? I would love to make these for a group market that we have at Christmas. Thank you for the recipe.
Vicki, They don’t need to be refrigerated. They can last up to 2 weeks. After that the texture starts to get crystallized a bit. As with any homemade treat, the sooner you eat them the better it will taste since there are no preservatives. Enjoy them! 🙂
How do you store them? Do you know how long they keep?
Wrap them in wax paper and them put them in an airtight container/tin or bowls/baskets for people to grab. They’re so good and addicting, you won’t be storing them for long! 🙂
Oh these sound yummy but we have corn allergies so they are a no go because of the corn syrup. Bummer!!!!!
If there is an alternative please let me know.
Denise, That is a bummer! You could substitute it with 1/2 cup honey and 1/4 cup molasses. I’ve never tried it, but the flavor/texture should be pretty close.
I was just going to make the same comment. Would simple syrup work?
Why is it bad to scrap ide of pan to get it all out?
You just don’t want what has cooked more than the rest because it will be firmer than the rest of the caramel.
Can this be thinned to make caramel icing ? My mother made the very best, but it was similar to this. It didn’t use powdered sugar .I wish I had her recipe. Thank you for replying.
If you want to put it on a cake or something you’ll just want to cook it for less time so that when it cools, it’s a syrup and doesn’t firm up. You’ll want to only cook it until it reaches about 220-235 degrees F.
Hi ???? , I love you recipe with Carmel ???? I want to used as toffy Carmel for filling cakes , is it the same recipe
I will be appreciated for you help
Thank you
Do you cool in the fridge overnight?
Nope. Just on the counter uncovered.
I just finished making these. They taste so good. Thank you for sharing the recipe.
What is the shelf life on these? How far ahead can I prepare them?
They are best if eaten within a week of making them.
Me podrían mandar a mi correo la receta
vhidalgo27@msn.com
En español
Gracias
Sí! 🙂
I can confirm – these are the best! And I am so glad I got to be a recipient of these for many years. Love you guys!
Thanks Margo! So glad you agree and appreciated them. 🙂 Have a Merry Christmas!
Do you use salted or unsalted butter in the recipe?
I always use salted butter in all my recipes.
These turned out gorgeous! I’m totally wanting to make caramels now. Perfect pictures!
I love homemade caramels – they just taste so much better than store-bought. Your story of making them for all your friends, family and neighbors is so sweet, I’m sure it makes all the work worth it.
These look so soft and perfect! What a great treat to give away at this time of year!
Wish I was your mailman so I could have a bag! Love, love, love homemade caramels. My mouth is watering right this minute!
Haha! These are so yummy! Looks like you’ll just have to make a batch! 😉
wow gonna make these …
These look amazing! Nothing beats homemade caramels!
Paige
http://thehappyflammily.com
So true! Thanks Paige!
Can these be frozen?
Sam, I have never tried freezing them. I can’t see why not but I’ll make them this next week and test some out in the freezer and get back to you.
Did you get a chance to try freezing these?
Deana, Yes! You’ll need to put them in an air tight container like a heavy duty freezer ziplock bag and make sure to get out as much air as possible.
How long can they be frozen for?
turned out great, fist time!